
Product Photography Recap
MATE 1-on-1 Session Recap
Thank you so much to the folks that signed up for my 1-on-1 sessions at the Mid-Atlantic Turning Expo!
It was great to meet each of you and help you level up your product photos. That’s my whole purpose behind Pen Portfolios, so thank you for being a part of it.
Just a heads up – the links on this page aren’t just any ordinary links, they’re Amazon affiliate links! What does that mean, you ask? Well, it means that if you click on one of those links and end up making a purchase on Amazon, I may earn a few pennies, maybe even a nickel. So not only do you get to snag some gear that’ll help you level up your product photography, but you also get to support my blog at the same time. Talk about a win-win situation!
Here are the product photography topics we covered:
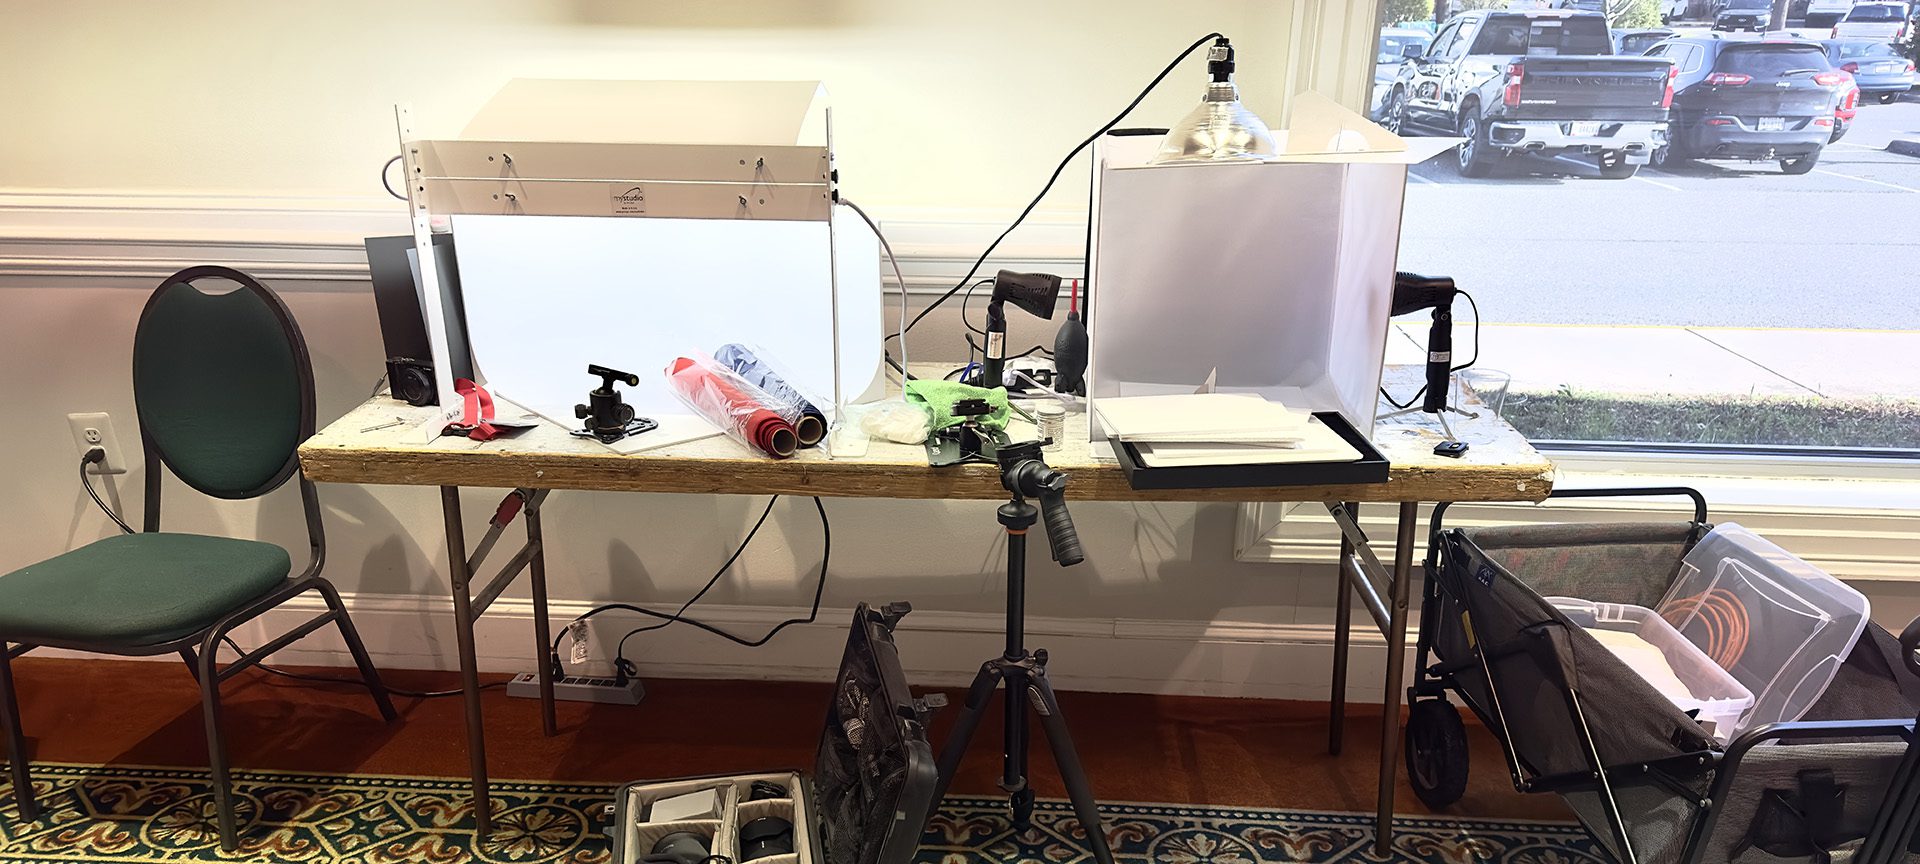
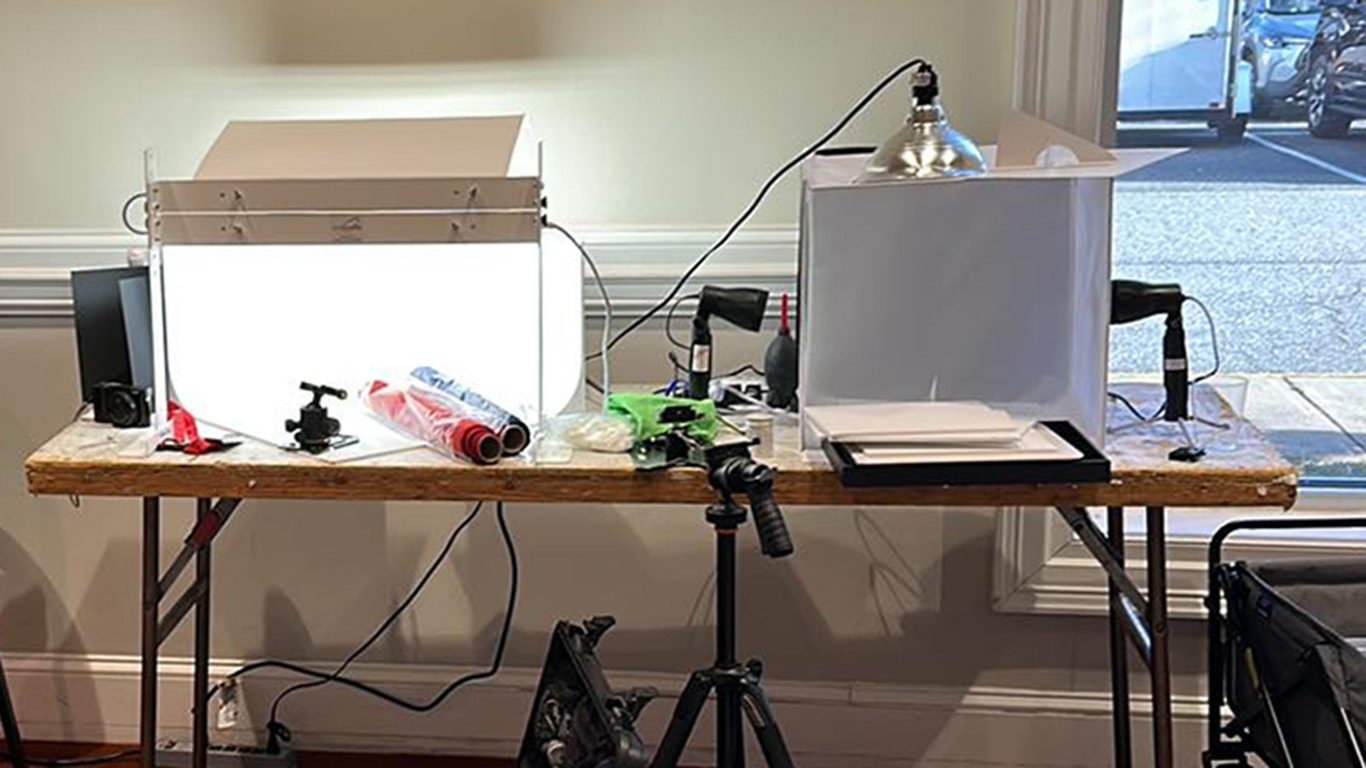
Lightbox
You saw the two options that I had. One was around $50 and the other around $300. I still do not like the boxes with the lights built into them because they reflect on the pens and they’re too difficult to diffuse enough to not blow out all the details on your pens.
I’ve had great success with the lower priced light box so don’t feel that you need the more expensive one in order to get good photos, that is not the case. I like the more expensive one because it doesn’t require as much retouching which saves me time.
Tripod
I cannot stress enough how important it is to use something to keep your camera still. I had two different platypods and a tripod and I think you saw the benefits of those things. Here are a few benefits to using a tripod:
- help your final photos be in focus
- help with the consistency of your photos
- frees up your hands to work the reflector
- keeps your reflections out of the pen hardware
Pose
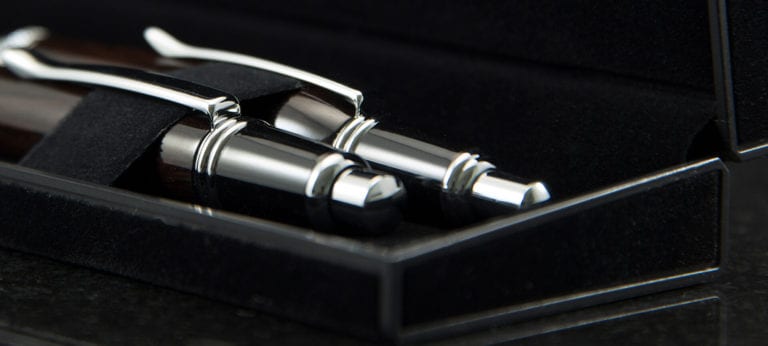
I showed you why I don’t like the different pen stands so I use Silly Putty to pose the pens. If you have a bunch of pens to photograph, it’s nice to put the Silly Putty in the light box and photograph all your pens in the same session.
Reflections
Keep in mind your own reflections in the pen hardware. Prop up some foam core boards to block out yourself. It does help to turn off the lights in the room you’re photographing in so you don’t create a mixed lighting situation. You really only need the lights from the light box.
Also, while the camera/phone is held in the tripod, take advantage of that live view to see if you can bounce light back onto the pen to help light up the shadows in the foreground. Sure, you can fix some of that in post processing but it’s way better, and will save you time, if you capture it correctly in the camera.
Check out this blog post for more details that I covered during the session.
Focus
By default, cameras will auto focus on the closest subject so be sure to set the focus where it should be. You don’t want such a shallow depth of field that your focus is on the tip of the pen and the rest is blurred out.
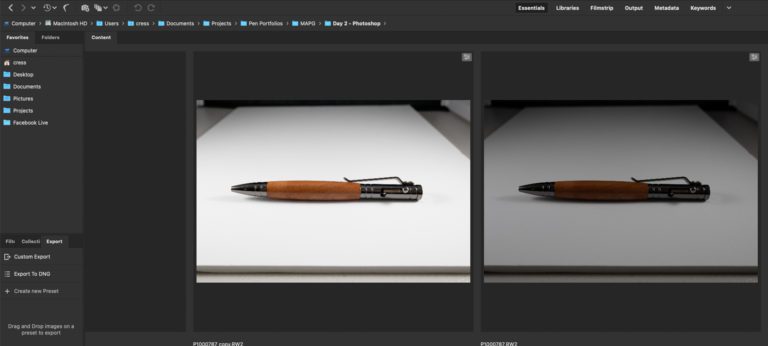
Retouch
As you saw in the 1-on-1 sessions, in order to really take the photos to the next level, you gotta do some amount of retouching. I recommend the Adobe Photography plan so you can get Lightoom and Photoshop for a mere $10 a month.
Now that I know there’s an interest, I plan to create some more content around Photoshop and retouching the pen images. Until then, remember that the Spot Healing Brush is your friend.
Pro Tip
If you’re going to get a Platypod, you’ll need to buy a ball head too. They’re not included.
Gear List
| Platypod Max |
| Platypod Ultra |
| Cell phone tripod mount |
| ball head |
| Lumi Studio |
| Foam core boards |
| Panasonic Lumix |
| Silly Putty |
| My Studio ProCyc |
| Adobe Photography Plan |
| Tripod |
Thanks again for joining me!! Feel free to leave comments here on this post or email me from the contact page. I’d love it if you’d share some of your new photos after this session.


games keno free games keno free .