Photo Tents For Your Pen Product Photos
Product Photos
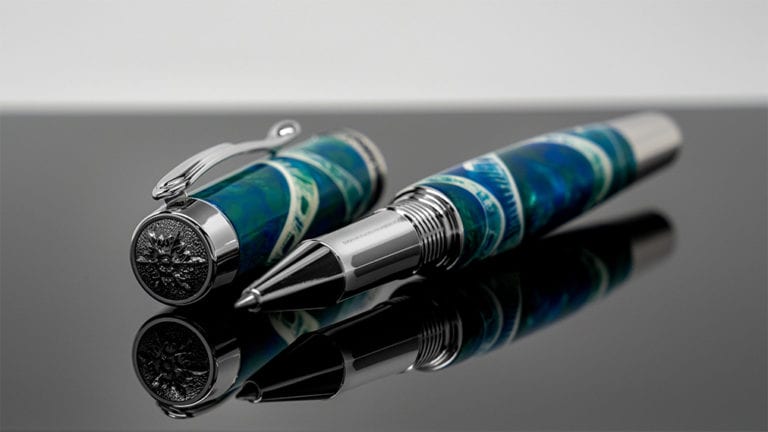
When it comes to product photos it’s a good idea to shoot on a clean background so that nothing is distracting from the pen you’re selling. White is probably the most common choice and it’s very safe. If you look at any of the popular pen makers like Cross, Visconti, Parker, Mont Blanc, all their main product images are on white backgrounds. It’s not the only color though, there’s nothing wrong with trying out something else but I’m going to speak about shooting on white backgrounds and show a few ways to achieve this.
I’ve chosen the three options to feature different price points and because I happen to have all this stuff at home.
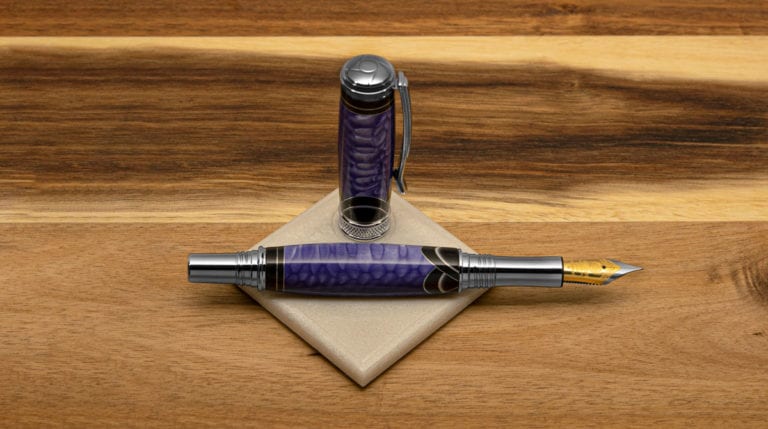
 Example of pen on white background.
Foam Core
The cheapest and easiest way to create a white studio setting is with two pieces of foam core. Pens aren’t that big so if you’re just photographing one at a time, you can probably get away with pretty small pieces. I bought a pack of 8×10 white foam core boards.
 White foam core
 Using diffuser
I left the foam core in the image below so you can see just how good that could look. I achieved this image using the overhead hallway light and holding the diffuser while the camera (with manually set white balance) was on a timer.
I bought white and black because I use them as reflectors (read the reflecting light blog post) with my other photo tent and I use the black foam core boards to absorb light.
The biggest benefit I see to this setup is that it’s incredibly portable so you can take photos anywhere. You just need a flat surface and something to prop up another piece as a background.
The biggest drawback I see is that you need to supply the lighting. This is good and bad. If you have a location with great lighting then it’s not a problem. In the example, I’m showing I was in my hallway which has just a regular ol’ lightbulb, nothing fancy. I didn’t like the highlight the hall light was creating on the shiny spot so I held up a diffuser to soften the overhead light.
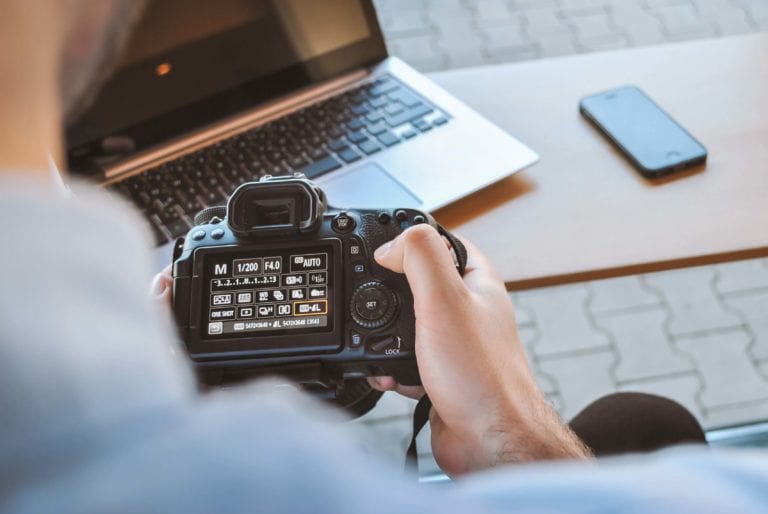
I’d recommend setting up by a window and taking advantage of natural light if you can. Otherwise, you can get perfectly good photos from this setup but it’s probably the setting where it’s most important to manually set the white balance on your camera. (See the getting accurate color blog post). This is most important in this setting because you will most likely have a mixed lighting situation, which means an overhead lightbulb with some natural light streaming in from a window and possibly another light. Totally depends on where you do this, of course, but it’s pretty common to have mixed lighting situations without using a photo tent which leads me to the second option…
 Result from foam core w/diffuser
LimoStudio 16″ x 16″ Table Top Photo Photography Studio Lighting Light Tent Kit in a Box
I bought LimoStudio tent from Amazon because of the $40 price tag, the relatively small size, and the fact that it includes lights.
The lights fold up and go in the slots in the front, it’s quite handy.
 LimoStudio table top photo light kit
 Set up w/lights
 LimoStudio light
 LimoStudio w/lights on
I love this thing! It’s the one I use the most. I don’t have a dedicated place where I can leave it set up but I try to leave it on my desk as much as I can because it encourages me to take more pictures and try things out.
This photo tent comes with a fabric background in red, black, blue, black and white. They attach with velcro… can I say that word? Hook & loop sounds so ridiculous to me. You know what I’m talking about, right? Anyway, I’ve only used the black and white backgrounds. I highly recommend running a lint roller over the background before attaching it to remove lint and junk so you won’t have to retouch it off in Photoshop. I keep the backgrounds rolled up on the cardboard tube it came with so they don’t get wrinkled up. I did actually steam the white fabric to get it flat as possible and I found that to be helpful. The fabric isn’t as slick as the foam core boards too so the pens usually don’t roll around.
I find the two lights to be pretty sufficient for most of my pictures. I often shoot in manual mode on a tripod with the camera timer set and consistently get great results. The sample photo at the beginning of this post was taken with this tent on the dowel using the floating pen effect.
 Photo from LimoStudio
Fotodiox Pro LED 28×28 Studio-in-a-Box for Table Top Photography
I landed a gig photographing some other products for a client and they were larger than pens so I needed a larger photo tent and I sprung for this Fotodiox Pro LED 28×28 Studio-in-a-Box.
 Fotodiox studio in a box
 Fotodiox setup w/side open
 Built-in LED lights
 Top hatch
 Fotodiox in action
I thought having the lights built-in would be super awesome but it wasn’t. Let me tell you why. The lights are LED and they’re embedded on the top of the tent. The levels are too hot for my taste which is photographer jargon for “it’s too bright.” I notice this problem in a lot of other pen pictures I’ve seen and I can usually tell if it was taken in a tent with built-in lights. The problem is that there’s not enough diffusion to soften the lights so all the metal hardware and bright colors are really blown out. This tent does include a baffle that attaches to the top but it’s only 1-stop, which is more photographer jargon for “it’s still too bright.” I’ll have to write another blog post on exposure value and go over that because it’s definitely something we can fix but it requires more knowledge about these things. All that being said, that’s why this wasn’t my favorite option. Also, you’ll probably need an extension cord because the cord for this is really short.
Where I think this tent shines is with the size and the little flaps on the side and the top. The size is good if you’re wanting to set up scenic pen shots that include a notebook or other props. The flaps minimize any other light sources and reflections from things around the room. I’ll definitely use it more for some other photos at a later date.
 Product photo from Fotodiox Photo Tent
Bonus Material
Additional Light
Sometimes I find that I do need more light than what came with the Limo Studio setup so I bought this work light.
I put a daylight colored LED bulb in it so that it matches the Limo Studio lights and it works out great. The daylight colored LED is key. I say again, the daylight colored bulb is key to this additional light. I usually find myself using this on top of the photo tent, pointing down to illuminate the background.
the daylight colored bulb is key to this additional light
 Worklight for added illumination
Keep the pen still
To keep pens from rolling around on in my photo tent, I use Silly Putty.
Can you believe it? Its purpose goes beyond pulling up the ink from the comic section of the newspaper and being bouncy.
I just pull off a little chunk, attach it to the pen and set it exactly how I want it. There’s nothing worse than thinking you’re done and then noticing later on the computer that the pen rolled into an awkward position. With this, I can purposely place the pen to show off the features I want to highlight.
 Silly putty
Wrapping Up
Hopefully, this gives you an idea of what’s available. There are probably a thousand other options, this is just what I have and have been using. The LimoStudio is definitely my favorite of what I have.
Thanks for reading!
 Size comparison